Using the video mode
Using the port
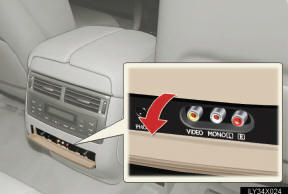
Open the cover.
The A/V input port is composed of 3 input ports.
Yellow: Video input port White: Left channel audio input port Red: Right channel audio input port
Selecting the video mode
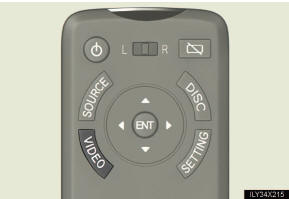
Press the “VIDEO” button, or select “A/V” on the source screen to select the video mode.
Changing to PAL format
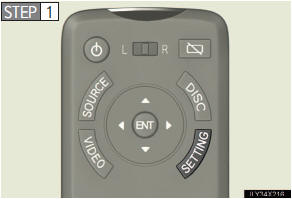
Press the “SETTING” button.
Turn “PAL VIDEO” on when PAL format equipment is connected to the A/V input port.
“PAL VIDEO” indicator is highlighted.
Setting LCD AI
Automatically determines the tone of the video image and sets the contrast to an optimum level, displaying a sharp image.

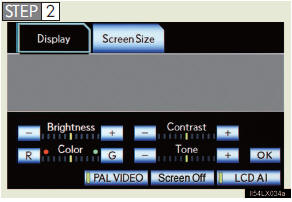
Select “LCD AI”.
“LCD AI” indicator is highlighted.
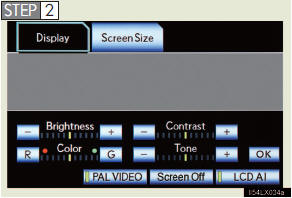
Setting the display mode
Press the “SETTING” button on the
controller.
 Select “Screen Size” tab on the
screen.
Select “Screen Size” tab on the
screen.
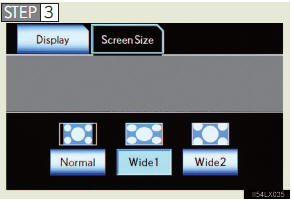
Select “Normal”, “Wide1” or “Wide2”.
Adjusting the screen
Press the “SETTING” button on the
controller.
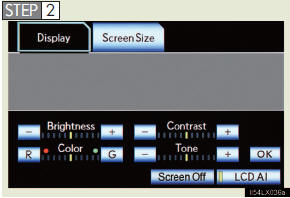
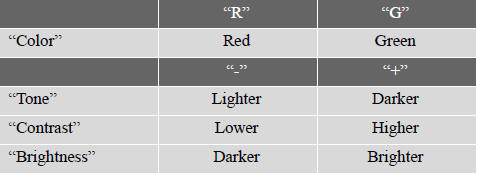
Select the color, tone, contrast or brightness, and make adjustments.
Select “OK”.
- A/V input port
The rear seat entertainment system plays videos and sound when audiovideo
equipment is connected to the A/V input port. For details, refer to the
manufacturer’s instructions.
- Power outlet
The power outlet is used to connect the audio-video equipment.
- To turn off the display
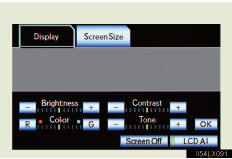
Select “Screen off” on the screen.
To turn the display back on, press the “SOURCE”, “DISC”, “VIDEO” or “SETTING” button on the controller.
NOTICE
- When the A/V input port is not in use
Keep the A/V input port cover closed.
Inserting anything other than an appropriate plug may cause electrical failure or a short circuit.
See also:
Call waiting
When a call is interrupted by an incoming call from a third party, the fol- lowing
options will become available:
• Answer the incoming call: Press the off-hook switch. (Press the off- hook switc ...
Key information
The following keys are provided with the vehicle.
1 Electronic keys
• Operating the smart access
system with push-button
start
• Operating the wireless
remote control function
2 Mechanica ...
Expanded voice commands
Touching “On” next to “Expanded
Voice Commands” on the “Voice Set-
tings” screen enables voice command
operation of the audio/video and air
conditioning system. (See page 56.) For
mor ...