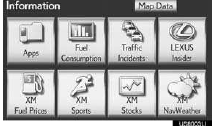
XM Fuel Prices
XM Fuel Prices is a service included with an XM TravelLink subscription. It enables the navigation system to display current fuel prices and gas station loca- tions, which can be set as a destination if desired.
SHOW XM Fuel Prices INFORMATION
1 Press the “INFO” button.
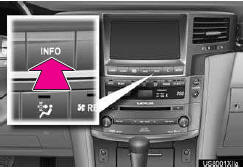
2 Touch “XM Fuel Prices”.
•The “Fuel Price” screen is displayed.
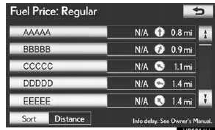
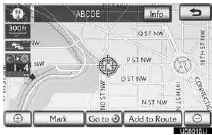
XM Fuel Prices SCREEN
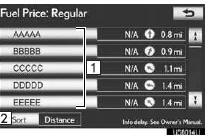
1 Gas station name
2 Sort
VIEW DETAILED FUEL PRICE INFORMATION
1 Press the “INFO” button.
2 Touch “XM Fuel Prices” on the “Infor- mation” screen.
3 Touch the desired gas station from the list.
•The location of the selected gas station will be displayed on the map screen.
4 Touch “Info”.
•When the map scale is at the maximum
range of 0.5 miles (800 m),  is not
shown. When the map scale is at the mini-
mum range of 150 ft. (50 m),
is not
shown. When the map scale is at the mini-
mum range of 150 ft. (50 m),  is
not
shown.
is
not
shown.
“Mark”: Touch to mark the selected gas
station on the map screen.
“Go to  ”: Touch to
set the selected gas
station as a destination with route direc-
tions.
”: Touch to
set the selected gas
station as a destination with route direc-
tions.
“Add to Route”: Touch to add the select-
ed gas station as a destination.
“Detail”: Touch to read the selected gas
station’s information.
• If
 is touched, the registered
phone number can be called.
is touched, the registered
phone number can be called.
INFORMATION
●The information displayed is received via satellite radio. Depending on the time the information is received, the displayed information may not be up to date.
XM Fuel Prices SETTINGS
The desired fuel type, preferred brand, and show prices reported can be regis- tered.
REGISTER FUEL TYPE
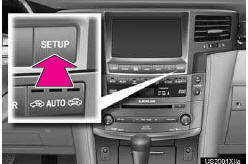
1 Press the “SETUP” button.
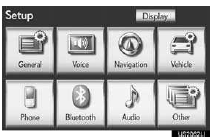
2 Touch “Other”.
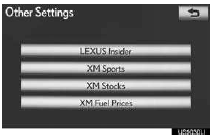
3 Touch “XM Fuel Prices”.
4 Touch “Fuel Type”.
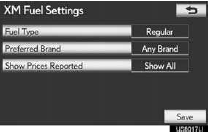
5 Touch the desired fuel type.
•“Premium”, “Midgrade”, “Regular” or “Diesel” can be selected.
6 Touch “Save”
REGISTER PREFERRED BRAND
1 Press the “SETUP” button.
2 Touch “Other” on the “Setup” screen.
3 Touch “XM Fuel Prices” on the “Other Settings” screen.
4 Touch “Preferred Brand”.
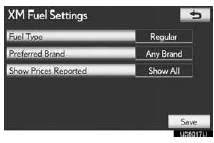
5 Touch the preferred brand.
6 Touch “Save”.
REGISTER SHOW PRICES REPORTED
1 Press the “SETUP” button.
2 Touch “Other” on the “Setup” screen.
3 Touch “XM Fuel Prices” on the “Other Settings” screen.
4 Touch “Show Prices Reported”.
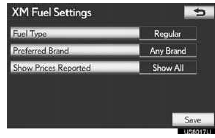
5 Touch the desired period.
• “Last 24 Hours”, “Last 2 Days” or “Show All” can be selected.
• If “Show All” is selected, information about gas stations which fuel prices are not pro- vided is also displayed on the list.
6 Touch “Save”.
See also:
Vehicle settings
Vehicle information can be set. ...
Registering home
1 Press the “DEST” button.
2 Touch “Go Home”.
If a home address has not been registered,
it can be registered by touching
“Go Home”.
3 Touch “Yes”.
4 There are 4 different ...
APPS
ACTIVATING “APPS”
Each time “Apps” is activated, the system
checks for updates. When there are
no updates available, the main menu
screen will be displayed right after a
screen indicating ...