Head restraints
Head restraints are provided for all seats.
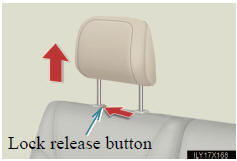
► Front seats
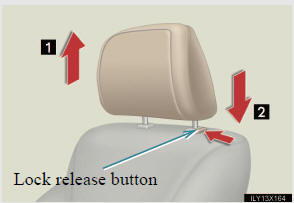
Vertical adjustment
1 Up
2 Down
Push the head restraint up or down while pressing the lock release button.
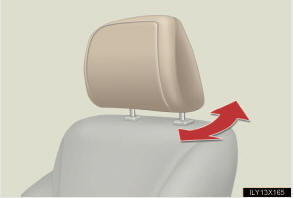
Angle adjustment (if equipped)
► Second seats
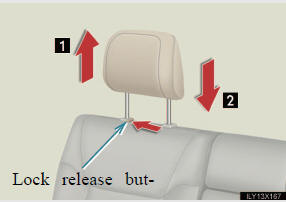
Vertical adjustment
1 Up
Pull the head restraints up.
2 Down
Push the head restraint down while pressing the lock release button.
► Third outboard seats
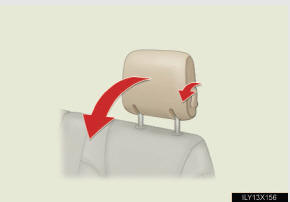
To fold
Pull the head restraint angle lever to fold the head restraint.
- Adjusting the height of the head restraints
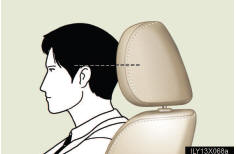
Make sure that the head restraints are adjusted so that the center of the head restraint is closest to the top of your ears.
- Adjusting the second center seat head restraint
Always raise the head restraint one level from the stowed position when
using.
- Removing the head restraints ►Front seats
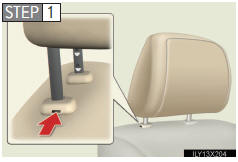
Push a flathead screwdriver into the slot.
The slot is located on the right side of the right head restraint anchor.
 While pressing in the
screwdriver, pull up the head restraint.
While pressing in the
screwdriver, pull up the head restraint.
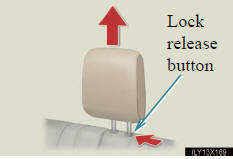
► Second seats
Pull the head restraint up while pressing the lock release button.
► Third center seat
Pull the head restraint up while pressing Lock the lock release button.
►Third outboard seats
The head restraint cannot be removed.
- Installing the head restraints (except third outboard seats)
 Align the head restraint with the
installation holes.
Align the head restraint with the
installation holes.
 Push down the head restraint to the
lock position.
Push down the head restraint to the
lock position.
- When not using the third center seat head restraint

Open the zipper on the back of the third seat and stow the head restraint inside.
CAUTION
- Head restraint precautions
Observe the following precautions regarding the head restraints. Failure to
do so may result in death or serious injury.
l Use the head restraints designed for each respective seat.
l Adjust the head restraints to the correct position at all times.
l After adjusting the head restraints, push down on them and make sure
they are locked in position.
l Do not drive with the head restraints removed.
See also:
Deleting previous destinations
The previous destination can be deleted.
1. Push the ÔÇťSETUPÔÇŁ button.
2. Touch ÔÇťNavi.ÔÇŁ on the ÔÇťSetupÔÇŁ screen.
3. Touch ÔÇťDelete Previous Dest.ÔÇŁ.
4. Touch the button you want to d ...
Foot print map
For the area which is covered by the foot print map (Some areas in the following
cities: Detroit, Chicago, N.Y., L.A), you can switch to the foot print map on a
scale of 75 feet (25 m).
To switch ...
Display items
Driving range
Displays the estimated maximum distance that can be driven with the quantity
of fuel remaining
ÔÇó This distance is computed based on your average fuel consump- tion. As a result, ...