Using the video mode
Using the port
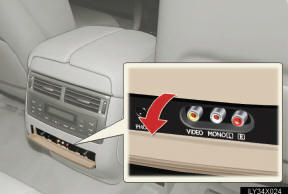
Open the cover.
The A/V input port is composed of 3 input ports.
Yellow: Video input port White: Left channel audio input port Red: Right channel audio input port
Selecting the video mode
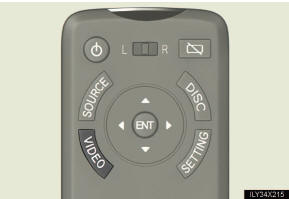
Press the тАЬVIDEOтАЭ button, or select тАЬA/VтАЭ on the source screen to select the video mode.
Changing to PAL format
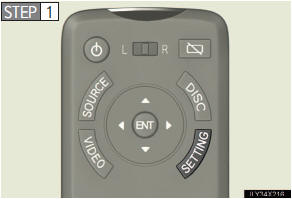
Press the тАЬSETTINGтАЭ button.
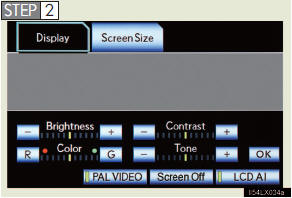
Turn тАЬPAL VIDEOтАЭ on when PAL format equipment is connected to the A/V input port.
тАЬPAL VIDEOтАЭ indicator is highlighted.
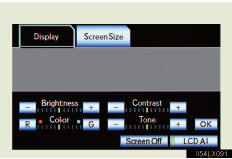
Setting LCD AI
Automatically determines the tone of the video image and sets the contrast to an optimum level, displaying a sharp image.

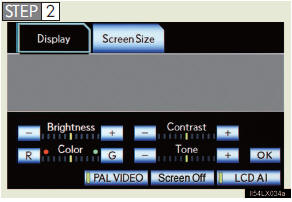
Select тАЬLCD AIтАЭ.
тАЬLCD AIтАЭ indicator is highlighted.
Setting the display mode
Press the тАЬSETTINGтАЭ button on the
controller.
 Select тАЬScreen SizeтАЭ tab on the
screen.
Select тАЬScreen SizeтАЭ tab on the
screen.
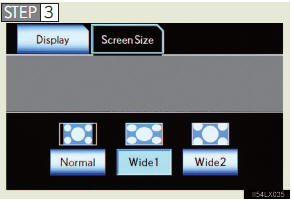
Select тАЬNormalтАЭ, тАЬWide1тАЭ or тАЬWide2тАЭ.
Adjusting the screen
Press the тАЬSETTINGтАЭ button on the
controller.
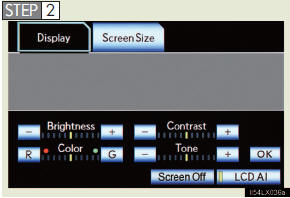
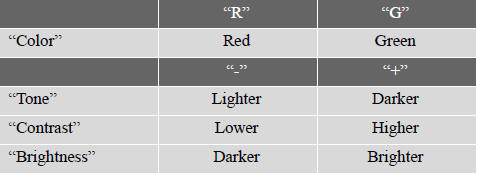
Select the color, tone, contrast or brightness, and make adjustments.
Select тАЬOKтАЭ.
- A/V input port
The rear seat entertainment system plays videos and sound when audiovideo
equipment is connected to the A/V input port. For details, refer to the
manufacturerтАЩs instructions.
- Power outlet
The power outlet is used to connect the audio-video equipment.
- To turn off the display
Select тАЬScreen offтАЭ on the screen.
To turn the display back on, press the тАЬSOURCEтАЭ, тАЬDISCтАЭ, тАЬVIDEOтАЭ or тАЬSETTINGтАЭ button on the controller.
NOTICE
- When the A/V input port is not in use
Keep the A/V input port cover closed.
Inserting anything other than an appropriate plug may cause electrical failure or a short circuit.
See also:
Customization
Customizable features
Your vehicle includes a variety of electronic features that can be
personalized
to suit your preferences. Programming of these preferences can be
performed by your Lexus dea ...
Disabling the TRAC or Active TRAC/VSC systems
If the vehicle gets stuck in fresh snow or mud, the TRAC or Active TRAC/ VSC
systems may reduce power from the engine to the wheels. You may need to turn the
system off to enable you to rock the v ...
Functional overview
Lexus Enform with Safety Connect is a generic name for Apps, Destination
Assist,
eDestination, Lexus Insider, and Safety Connect.
тАв The functions included in Lexus Enform
with Safety Connect a ...