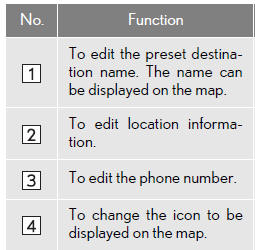
Address book
Navigation settings
Points or areas on the map can be registered.
The registered points can be used on the “Destination” screen.
Registered areas to avoid, will be avoided when the system searches for a route.
1 Press the “SETUP” button.
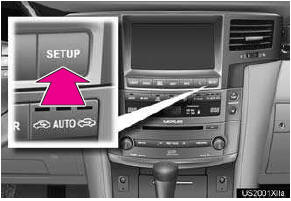
2 Touch “Navigation”.
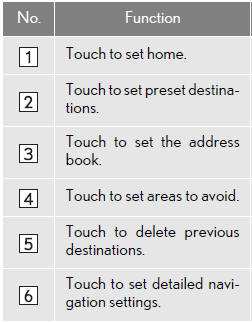
3 Touch the desired items to be set.
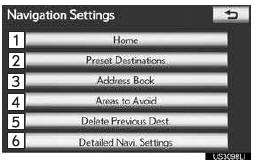
• On this screen, the following operations can be performed:
SETTING UP THE “Home”
If home has been registered, that information can be recalled by touching “Go Home” on the “Destination” screen.
1 Press the “SETUP” button.
2 Touch “Navigation” on the “Setup”
screen.
3 Touch “Home”.
4 Touch the desired screen button.
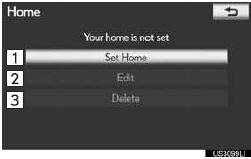
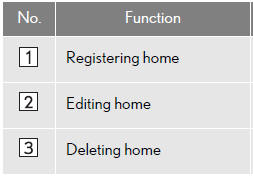
REGISTERING HOME
1 Press the “SETUP” button.
2 Touch “Navigation” on the “Setup”
screen.
3 Touch “Home” on the “Navigation Settings”
screen.
4 Touch “Set Home”.
5 Touch the desired screen button and enter the location in the same way as for a destination search.
•When registration of home is completed, the “Edit Home” screen will be displayed.
6 Touch “OK”.
EDITING HOME
1 Press the “SETUP” button.
2 Touch “Navigation” on the “Setup”
screen.
3 Touch “Home” on the “Navigation Settings”
screen.
4 Touch “Edit”.
5 Touch “Edit” next to the item to be edited.
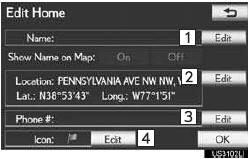
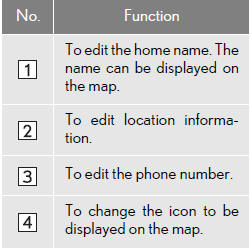
“Show Name on Map”: The name of a home can be set to be displayed on the map by touching “On” or “Off”.
6 Touch “OK”.
DELETING HOME
1 Press the “SETUP” button.
2 Touch “Navigation” on the “Setup”
screen.
3 Touch “Home” on the “Navigation Settings”
screen.
4 Touch “Delete”.

5 Touch “Yes” to delete home and touch “No” to cancel the deletion.
SETTING UP THE “Preset Destinations”
If preset destination has been registered, that information can be recalled by using “Preset Destinations” on the “Navigation Settings” screen.
1 Press the “SETUP” button.
2 Touch “Navigation” on the “Setup”
screen.
3 Touch “Preset Destinations”.
4 Touch the desired screen button.
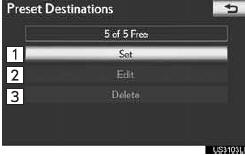
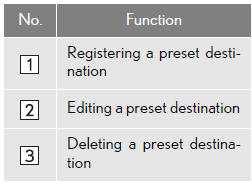
REGISTERING PRESET DESTINATIONS
1 Press the “SETUP” button.
2 Touch “Navigation” on the “Setup”
screen.
3 Touch “Preset Destinations” on the
“Navigation Settings” screen.
4 Touch “Set”.
5 Touch the desired screen button and enter the location in the same way as for a destination search.
6 Touch a position for this preset destination.
• When registration of a preset destination is completed, the “Edit Preset Destination” screen will be displayed.
7 Touch “OK”.
EDITING PRESET DESTINATIONS
1 Press the “SETUP” button.
2 Touch “Navigation” on the “Setup”
screen.
3 Touch “Preset Destinations” on the
“Navigation Settings” screen.
4 Touch “Edit”.
5 Touch the screen button of the desired preset destination.
6 Touch “Edit” next to the item to be edited.
“Show Name on Map”: The name of a preset destination can be set to be displayed on the map by touching “On” or “Off”.
7 Touch “OK”.
DELETING PRESET DESTINATIONS
1 Press the “SETUP” button.
2 Touch “Navigation” on the “Setup”
screen.
3 Touch “Preset Destinations” on the
“Navigation Settings” screen.
4 Touch “Delete”.
5 Touch the preset destination to be deleted.
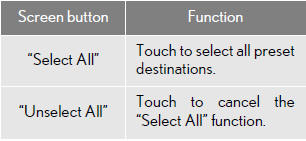
6 Touch “Delete”.
7 Touch “Yes” to delete the preset destination
and touch “No” to cancel the deletion.
SETTING UP THE “Address Book”
Points or areas on the map can be registered.
1 Press the “SETUP” button.
2 Touch “Navigation” on the “Setup”
screen.
3 Touch “Address Book”.
4 Touch the desired screen button.
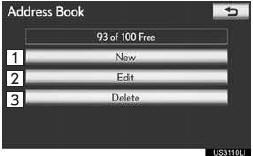
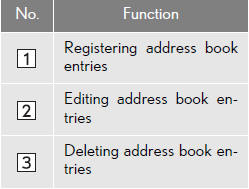
REGISTERING ADDRESS BOOK ENTRIES
1 Press the “SETUP” button.
2 Touch “Navigation” on the “Setup” screen.
3 Touch “Address Book” on the “Navigation Settings” screen.
4 Touch “New”.
5 Touch the desired screen button and enter the location in the same way as for a destination search.
• After the address book entry has been registered, the “Edit Address Book Entry” screen will be displayed.
6 Touch “OK”.
INFORMATION
● Up to 100 address book entries can be registered.
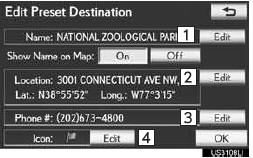
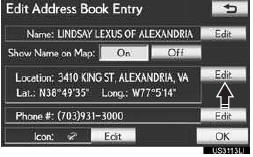
EDITING ADDRESS BOOK ENTRIES
The icon, name, location and/or phone number of a registered address book entry can be edited.
1 Press the “SETUP” button.
2 Touch “Navigation” on the “Setup” screen.
3 Touch “Address Book” on the “Navigation Settings” screen.
4 Touch “Edit”.
5 Touch the screen button of the desired address book entry.
6 Touch “Edit” next to the item to be edited.
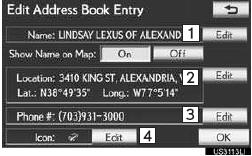
“Show Name on Map”: The name of an address book entry can be set to be displayed on the map by touching “On” or “Off
7 Touch “OK”.
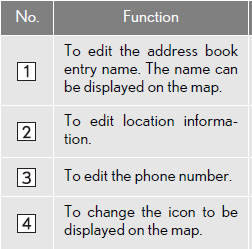
■TO CHANGE ‚ÄúIcon‚Äù
1 Touch “Edit”.
2 Touch the desired icon.
• Change pages by touching the “Page 1”, “Page 2” or “With Sound” tab.
■SOUND ICONS
A sound for some address book entries can be set. When the vehicle approaches the location of the address book entry, the selected sound will be heard.
1 Touch the “With Sound” tab on the “Address
Book Entry Icon” screen.
2 Touch the desired sound icon.
• The next screen appears when “Bell (with Direction)” is touched.
3 Touch either  or
or
 to adjust the direction.
Touch “OK”.
INFORMATION
● The bell sounds only when the vehicle approaches this point in the direction that has been set.
■TO CHANGE ‚ÄúName‚Äù
1 Touch “Edit”.

2 Enter the name using the alphanumeric keys.
• Up to 32 characters can be entered.
3 Touch “OK”.
• The previous screen will be displayed.
■DISPLAYING ADDRESS BOOK ENTRY NAMES
1 Touch “On” to display the name on the map and touch “Off” to not display it.
■TO CHANGE ‚ÄúLocation‚Äù
1 Touch “Edit”.
2 Touch one of the 8 directional screen
buttons to move the cursor  to the
desired
point on the map.
to the
desired
point on the map.
3 Touch “OK”.
• The previous screen will be displayed.
■TO CHANGE ‚ÄúPhone #‚Äù (PHONE NUMBER)
1 Touch “Edit”.

2 Enter the number using the number keys.
3 Touch “OK”.
• The previous screen will be displayed.
DELETING ADDRESS BOOK ENTRIES
1 Press the “SETUP” button.
2 Touch “Navigation” on the “Setup” screen.
3 Touch “Address Book” on the “Navigation Settings” screen.
4 Touch “Delete”.
5 Touch the address to be deleted.
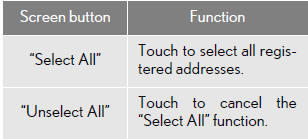
6 Touch “Delete”.
7 Touch “Yes” to delete the address book and touch “No” to cancel the deletion.
SETTING UP THE “Areas to Avoid”
Areas to be avoided because of traffic jams, construction work or other reasons can be registered as areas to avoid.
1 Press the “SETUP” button.
2 Touch “Navigation” on the “Setup” screen.
3 Touch “Areas to Avoid”.
4 Touch the desired screen button
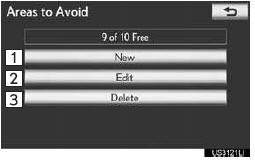
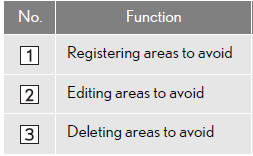
REGISTERING AREAS TO AVOID
1 Press the “SETUP” button.
2 Touch “Navigation” on the “Setup” screen.
3 Touch “Areas to Avoid” on the “Navigation Settings” screen.
4 Touch “New”.
5 Touch the desired screen button and enter the location in the same way as for a destination search, or display the map of the area to be avoided.
6 Scroll the map to the desired point.
“Adjust Location”: Touch to adjust the position in smaller increments.
7 Touch “Enter”.
8 Touch either or to change the size of the area to be avoided.
9 Touch “OK”.
•When registration of an area to avoid is completed, the “Area to Avoid” screen will be displayed.
INFORMATION
● If a destination is input in the area to avoid or the route calculation cannot be made without running through the area to avoid, a route passing through the area to be avoided may be shown.
● Up to 10 locations can be registered as points/areas to avoid.
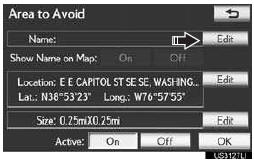
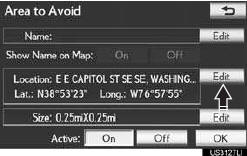
EDITING AREA TO AVOID
The name, location and/or area size of a registered area can be edited.
1 Press the “SETUP” button.
2 Touch “Navigation” on the “Setup” screen.
3 Touch “Areas to Avoid” on the “Navigation Settings” screen.
4 Touch “Edit”.
5 Touch the area to be avoide
6 Touch “Edit” next to the item to be edited.
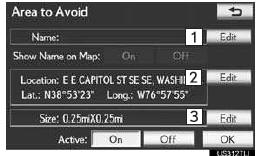
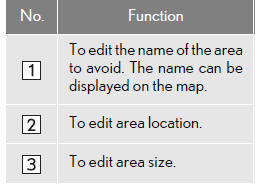
“Show Name on Map”: The name of an area to be avoided that may be displayed on the map by touching “On” or “Off”.
“Active”: To turn on or off the area to avoid feature. To turn on the feature, touch “On” on the “Area to Avoid” screen. To turn off the feature, touch “Off” on the “Area to Avoid” screen.
7 Touch “OK”.
■TO CHANGE ‚ÄúName‚Äù
1 Touch “Edit”.
2 Enter the name using the alphanumeric keys.
• Up to 32 characters can be entered.
3 Touch “OK”.
• The previous screen will be displayed.
■DISPLAYING NAMES OF AREAS TO BE AVOIDED
1 Touch “On”, next to “Show Name on Map”, to display the area to be avoided name on the map. Touch “Off” to not display it.
■TO CHANGE ‚ÄúLocation‚Äù
1 Touch “Edit”.
2 Touch one of the 8 directional screen
buttons to move the cursor  to the
desired
point on the map.
to the
desired
point on the map.
3 Touch “OK”.
• The previous screen will be displayed.
■TO CHANGE ‚ÄúSize‚Äù
1 Touch “Edit”.
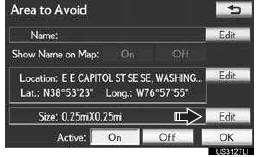
2 Touch either  or
or
 to change the
size of the area to be avoided.
to change the
size of the area to be avoided.
3 Touch “OK”.
• The previous screen will be displayed.
DELETING AREAS TO AVOID
1 Press the “SETUP” button.
2 Touch “Navigation” on the “Setup” screen.
3 Touch “Areas to Avoid” on the “Navigation Settings” screen.
4 Touch “Delete”.
5 Touch the area to be deleted.
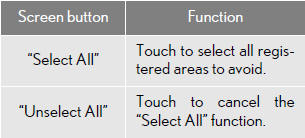
6 Touch “Delete”.
7 Touch “Yes” to delete the area(s) and touch “No” to cancel the deletion.
DELETING PREVIOUS DESTINATIONS
Previous destinations can be deleted.
1 Press the “SETUP” button.
2 Touch “Navigation” on the “Setup” screen.
3 Touch “Delete Previous Dest.”.
4 Touch the previous destination to be deleted.
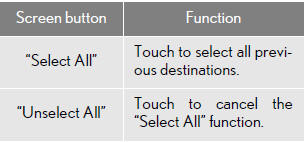
5 Touch “Delete”.
6 Touch “Yes” to delete the destination(s) and touch “No” to cancel the deletion.
See also:
General maintenance
Listed below are the general maintenance items that should be performed at
the intervals specified in the “Warranty and Service Guide” or “Owner’s Manual Supplement”.
It is recommended t ...
Power easy access system
When the driver enters and exits the vehicle, the driver’s seat and steer- ing
wheel will automatically perform the following operations:
Exiting the vehicle: When all of the following actions ...
Voice settings
Voice guidance can be set.
1. Push the “SETUP” button.
2. Touch “Voice”.
3. Touch the items to be set.
4. Touch “Save”.
SCREEN FOR VOICE SETTINGS
On this screen, the follow ...