Setting up the “Preset Destinations”
If preset destination has been registered, that information can be recalled by using “Preset Destination” on the “Destination” screen. (See “— Destination search by Preset destinations” on page 64.)
1. Push the “SETUP” button.
2. Touch “Navi.” on the “Setup” screen.
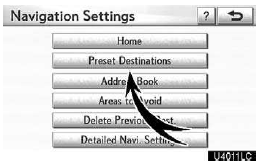
3. Touch “Preset Destinations”.
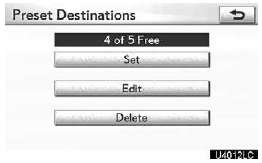
- Registering preset destination
- Editing preset destination
- Deleting preset desti
(a) Registering preset destinations
1. Push the “SETUP” button.
2. Touch “Navi.” on the “Setup” screen.
3. Touch “Preset Destinations” on the “Navigation Settings” screen.
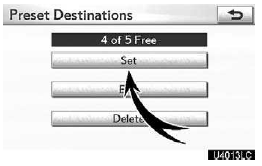
4. Touch “Set”.
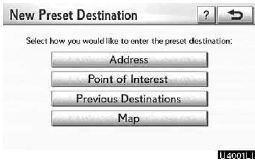
5. Enter the location in the same way as for a destination search.
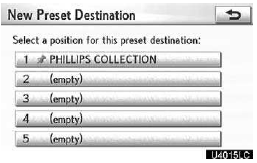
6. Touch a position for this preset destination.
When registration of preset destination is completed, the “Edit Preset Destination” screen will be displayed.
7. Touch “OK”.
To edit registered information, see “(b) Editing preset destinations” on page 115.
(b) Editing preset destinations
1. Push the “SETUP” button.
2. Touch “Navi.” on the “Setup” screen.
3. Touch “Preset Destinations” on the “Navigation Settings” screen.
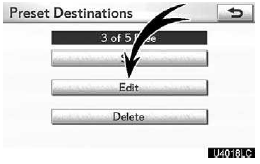
4. Touch “Edit”.
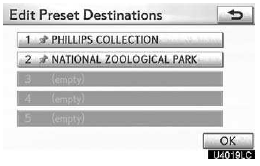
5. Touch the button of the desired preset destination.
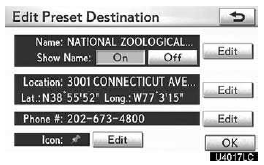
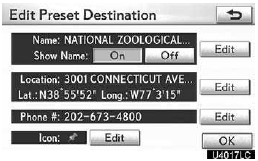
6. Touch “Edit” for the item you want to change.
“Name”: To edit preset destination names.
The names can be displayed on the map.
“Location”: To edit location information.
“Phone #”: To edit telephone numbers.
“Icon”: To select icons to be displayed on the map.
7. Touch “OK”.
(c) Deleting preset destinations
1. Push the “SETUP” button.
2. Touch “Navi.” on the “Setup” screen.
3. Touch “Preset Destinations” on the “Navigation Settings” screen.
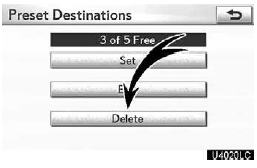
4. Touch “Delete”.
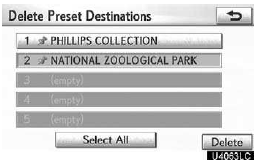
5. Touch the preset destination for deletion.
“Select All”: To select all preset destinations on the list.
“Unselect All”: To unselect all of the selected preset destinations.
6. Touch “Delete”.
7. To delete preset destination, touch “Yes”. To cancel the deletion, touch “No”.
See also:
Unlocking and locking the back door
1.Locks the all doors
2. Unlocks the all doors
The doors cannot be unlocked for 3 seconds after the doors are locked. ...
Speed dials setting
“Speed dials setting” is accessed from the “Speed Dials” screen.
1. Push the “SETUP” button.
2. Touch “Phone”.
3. Touch “Phonebook”.
4. Touch “Manage Speed Dials”.
Ple ...
Route overview
1. Touch “Route”.
2. Touch “Overview”.
The entire route from the current position to the destination is displayed.
“OK”: To start guidance.
“Turn List”: The following screen ...